
Crispy & Juicy Fried Chicken Breast Recipe: Simple Guide
Written By Santa Prisca & Co Staff Last updated on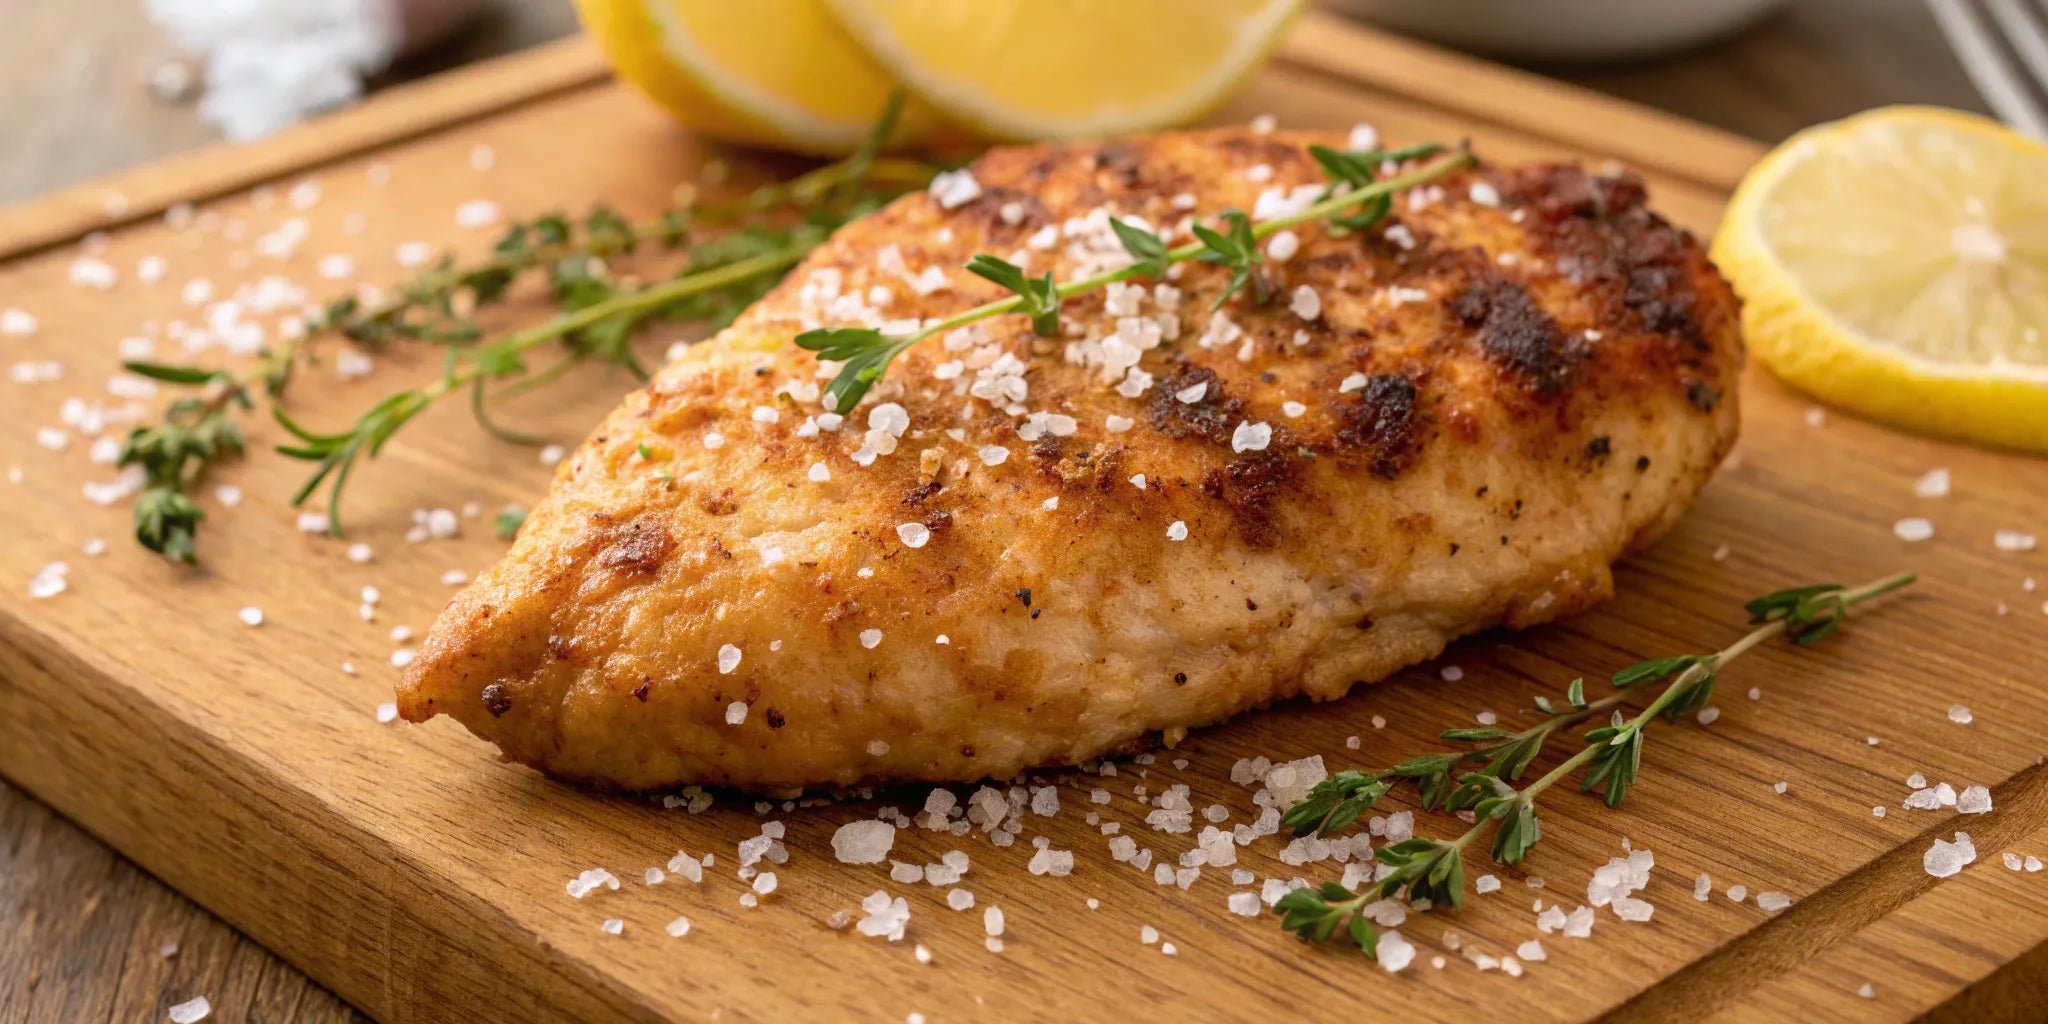
Before we even talk about flour or frying, let’s talk about salt. It’s the most fundamental seasoning, yet its power is often overlooked. The right salt doesn’t just make food salty; it makes it taste more like itself, amplifying every other flavor note. When you use a hand-harvested, unrefined sea salt, you’re adding a layer of mineral complexity that processed salt simply cannot offer. This fried chicken breast recipe is a beautiful way to experience that difference firsthand. We’ll show you how this single, intentional ingredient choice becomes the foundation for the juiciest, most flavorful chicken you’ve ever made at home.
Key Takeaways
- Embrace the process before the fry: Simple, intentional steps like letting your chicken rest at room temperature and allowing the coating to set are crucial. This patience ensures the meat cooks evenly and the crust adheres perfectly for a juicy, crisp result.
- Build flavor with quality ingredients: The most delicious fried chicken starts with mindful choices. An unrefined, mineral-rich sea salt does more than just make food salty—it enhances the chicken’s natural flavor from the inside out for a more nuanced and satisfying taste.
- Master the fry with temperature control: The secret to a golden, non-greasy crust is maintaining a steady oil temperature around 350°F. Using a thermometer and frying in batches prevents the oil from cooling down, guaranteeing a perfectly crisp exterior and a fully cooked, tender interior.
The Art of the Perfect Fried Chicken Breast
Creating that perfect fried chicken breast—the kind with a crust that shatters lightly and gives way to impossibly juicy meat—is a beautiful culinary ritual. It’s less about a rigid set of rules and more about understanding a few simple techniques that honor the ingredients and the process. When you get it right, it’s a meal that feels both deeply comforting and truly special.
One of the most common missteps happens before the chicken even touches the pan. Cooking it straight from the cold of the refrigerator can cause the outside to cook too quickly while the inside remains underdone. A little patience goes a long way. Let your chicken rest on the counter for about 20 minutes. This small pause allows it to cook more evenly, ensuring every bite is succulent.
Next, let’s talk about the coating. You don’t need a complicated batter for a wonderfully crisp exterior. A simple dredge of flour, seasoned with intention, is often the secret. This is where the quality of your salt truly shines. A mineral-rich, unrefined sea salt, like our Colima Sea Salt, brings a clean, profound flavor that permeates the chicken, rather than just sitting on the surface. It’s about building layers of flavor from the very beginning.
Finally, the fry itself. The key is to give each piece of chicken its own space in the pan. Overcrowding the pan is one of the most frequent fried chicken mistakes because it dramatically lowers the oil's temperature, leading to a greasy, lackluster crust. Instead, work in batches. Listen for that steady, energetic sizzle—it’s the sound of a perfect golden crust in the making. By embracing these simple steps, you can master a fried chicken breast that is consistently delicious.
Start with Quality Ingredients
The secret to truly memorable fried chicken isn’t a complicated recipe or a hidden technique. It begins much earlier, with the simple, intentional act of choosing your ingredients. When you start with quality, you build a foundation of flavor that can’t be replicated. Think of it as the difference between a quick meal and a moment of genuine pleasure. Every component, from the chicken to the oil to the final dusting of salt, plays a part in the final story your dish tells. Taking a moment to select ingredients with care is an act of respect for the food, the process, and the people you’ll be sharing it with. It’s the first, most important step toward creating something truly delicious.
Choose Your Chicken and Oil
The best fried chicken starts with good chicken. Whenever possible, look for fresh, high-quality chicken, as it will yield a more tender and flavorful result. The same mindfulness applies to your cooking oil. The process of frying transforms food, so starting with pure, clean ingredients makes all the difference. You’ll want a neutral cooking oil with a high smoke point, like avocado, grapeseed, or peanut oil. These oils can handle the heat without breaking down and imparting an unwanted flavor, allowing the taste of the seasoned chicken to be the star. Choosing the right one ensures your chicken cooks evenly and develops that perfect golden-brown crust we’re all after.
Gather Your Spices and Seasonings
You don’t need a cabinet full of spices to create a delicious crust. In fact, some of the most incredible fried chicken relies on a simple blend that enhances, rather than masks, the flavor of the meat. A straightforward mix of all-purpose flour, freshly ground black pepper, and perhaps a touch of paprika or garlic powder is all you need to create a classic, savory coating. The real magic, however, comes from the salt. It’s the element that ties everything together, amplifying the other flavors and making the chicken taste more like itself. This is where quality is non-negotiable.
Why We Use Unrefined Sea Salt
Not all salt is created equal. While standard table salt will make your chicken salty, an unrefined sea salt will make it flavorful. Unlike processed salt, which is stripped of its natural minerals and often contains anti-caking agents, unrefined salt is salt in its pure, natural state. Our hand-harvested Colima Sea Salt is a perfect example. Its delicate, crystalline flakes dissolve beautifully into the coating, and its rich mineral profile adds a subtle, complex depth that you can’t get from anything else. This is how you create a crust that’s not just salty, but savory, nuanced, and deeply satisfying.
How to Marinate for Flavor and Tenderness
This is where the real transformation begins, a quiet moment of preparation that honors the ingredients and sets the stage for an incredible meal. Taking the time to marinate your chicken is a small act of intention that makes all the difference, turning a simple chicken breast into something deeply flavorful and incredibly juicy. A good marinade does two things: its acidity gently tenderizes the meat, while the salt works to season the chicken from the inside out and helps it retain moisture. This is why the quality of your salt matters so much; it’s not just adding flavor, but fundamentally changing the texture for the better.
This simple step ensures every single bite is succulent and seasoned through and through. It’s the secret to fried chicken that’s never dry and always memorable. Think of it as a foundational layer of care. When you combine a simple acid with a mineral-rich, unrefined sea salt, you’re not just following a recipe; you’re engaging in a process that has been perfected over generations. This is how you build flavor from within, creating a juicy canvas for that perfect, crispy crust to cling to. It’s a step that requires a little patience, but the delicious result is more than worth the wait.
The Classic Buttermilk Brine
There’s a reason buttermilk is the foundation of so many beloved fried chicken recipes. This time-honored technique uses the gentle lactic acid in buttermilk to tenderize the chicken without turning it mushy, resulting in an exceptionally tender and moist texture. It also leaves a subtle, pleasant tang that beautifully complements the salty, crispy crust. For your brine, simply combine buttermilk with a generous pinch of our Colima sea salt and your favorite spices. This simple soak is one of the most effective ways to guarantee juicy chicken every single time, infusing it with moisture and flavor deep within.
Lighter Marinade Options
If you don’t have buttermilk on hand or simply prefer a different flavor profile, plain Greek yogurt or sour cream are wonderful alternatives. They provide a similar tenderizing acidity while lending a rich, creamy note to the chicken that is absolutely delicious. I love mixing full-fat Greek yogurt with a spoonful of dijon mustard, a squeeze of fresh lemon juice, and some freshly ground black pepper for a bright and zesty marinade. This approach is just as effective at tenderizing and is a great way to add another thoughtful layer of flavor before you even get to the frying stage.
How Long to Marinate Your Chicken
Patience is a key ingredient here, but even a short marinade is better than none at all. If you’re short on time, let the chicken rest in its marinade for at least 30 minutes at room temperature. For more pronounced flavor and tenderness, aim for four to six hours in the refrigerator. For the absolute best results, an overnight soak is ideal, giving the salt and acid ample time to work their magic. Planning ahead for this step is a simple kitchen ritual that rewards you with truly exceptional fried chicken, transforming the process from a task into a practice of care.
Create the Perfect Crispy Coating
The moment of truth for any fried chicken is the crust. It’s the first thing you experience—that audible crunch giving way to tender, juicy meat. Creating this layer isn’t just a step; it’s an art form that requires a little patience and intention. This is where you build the texture and deepen the flavor that will make your meal memorable. Forget thick, heavy batters that fall off. We’re aiming for a coating that feels light, looks golden, and clings to the chicken perfectly.
Think of this process as a quiet ritual. As you dredge the chicken, you’re building a foundation. The simple act of coating each piece with care transforms the final dish from just food into a true sensory experience. By focusing on a few key techniques, you can consistently achieve that shatteringly crisp crust that everyone hopes for. It’s less about a secret recipe and more about understanding how simple ingredients work together to create something truly special.
Try the Double-Dip Method
For an exceptionally crisp crust, the double-dip method is a beautiful technique. It creates delicate, flaky layers that become incredibly crunchy when fried. Start by preparing a seasoned flour mixture. In a shallow dish, combine your flour with garlic powder, onion powder, and a whisper of paprika. Then, add a generous pinch of our Colima Sea Salt to bring a subtle, mineral depth to every bite.
In a separate bowl, beat an egg. Dip each piece of marinated chicken into the egg, then dredge it thoroughly in the flour mixture. Dip it back into the egg for a second time, and then once more into the flour. This double coating is what builds that signature texture. Let the coated chicken rest for about ten minutes before frying; this small pause allows the coating to hydrate and adhere, ensuring it stays put in the hot oil.
Explore Different Flour Options
While all-purpose flour is a classic choice, the type of flour you use is an opportunity for creativity. Different flours and starches create different textures, so feel free to explore what you enjoy most. For an incredibly light and crispy crust, you can even skip the egg wash altogether.
A simple dry batter made from all-purpose flour, baking powder, black pepper, and salt can create a wonderfully delicate crust that almost shatters when you bite into it. Some cooks swear by adding a bit of cornstarch to their flour mix for an extra-crisp finish. There’s no single right answer here. This is your kitchen, and part of the joy is in the discovery. Experiment with different combinations to find the texture that makes you happiest.
How to Coat Your Chicken Evenly
Patience is the key ingredient for a coating that’s both even and resilient. Once your chicken is breaded, don’t rush it straight to the fryer. Instead, place the pieces on a wire rack and let them rest in the refrigerator for at least 30 minutes, and up to a few hours. This crucial resting period gives the flour time to fully absorb the moisture from the marinade and the chicken itself.
This hydration process creates a sort of paste-like layer that sticks to the chicken like glue, preventing the breading from falling off during frying. It’s a simple, hands-off step that makes a world of difference in the final texture. Just be mindful not to leave it for too long—more than four hours can cause the coating to become gummy. This moment of pause is your insurance policy for a perfectly golden, crispy crust.
Fry Your Chicken with Confidence
The moment the coated chicken hits the hot oil is a sensory experience—the immediate sizzle, the fragrant aroma filling your kitchen. For many, frying feels like a technique reserved for restaurants, but I promise you, it’s a skill you can master at home. It’s less about complicated steps and more about mindful attention to temperature and timing. When you approach it with intention, frying becomes a beautiful process of transformation, turning simple ingredients into something truly special.
Frying with confidence means trusting your senses and your tools. It’s about knowing how to listen for the right sizzle and look for that perfect golden-brown color. It’s also about understanding the simple science behind a crispy crust and a juicy interior. With a few key principles in mind, you can leave behind the fear of undercooked or overcooked chicken. Instead, you can focus on the joy of creating a deeply satisfying meal for yourself and the people you love. This isn’t just about cooking; it’s about creating a moment of pure, delicious comfort.
Get the Temperature and Timing Right
The secret to a perfectly crisp, golden-brown crust that isn’t greasy lies in the oil temperature. You’re aiming for a steady 350°F. At this heat, the coating fries to a beautiful crispness at the same rate the chicken cooks through. A kitchen thermometer is a wonderful tool for this, giving you precision and confidence. If you don’t have one, you can use a more traditional method from this crispy fried chicken breast recipe: just dip the handle of a wooden spoon into the oil. If bubbles form steadily around the wood, your oil is ready.
How to Cook Through Without Drying Out
Here is a small act of patience that makes all the difference: let your chicken rest at room temperature for about 20 minutes before frying. Placing cold chicken directly into hot oil shocks the meat, causing the outside to cook too quickly while the inside remains raw. This simple pause allows the chicken to cook evenly, ensuring the center becomes perfectly tender and juicy just as the exterior turns golden. It’s a quiet moment of preparation that honors the ingredient and is one of the most important ways to avoid common mistakes when cooking chicken.
Use a Meat Thermometer for Best Results
For true peace of mind, a meat thermometer is your best friend in the kitchen. It removes all the guesswork, letting you know the exact moment your chicken is perfectly cooked. You’re looking for an internal temperature of 155°F in the thickest part of the breast. The chicken will continue to cook as it rests, reaching the final safe temperature of 165°F. Using a thermometer ensures every piece is not only succulent and flavorful but also perfectly safe to eat. It’s a simple step that allows you to serve your beautiful meal with complete confidence, just like in this crispy fried chicken breast recipe.
Lighter Cooking Methods to Try
Sometimes, the occasion calls for something a little lighter, but that never means you have to compromise on flavor. The beauty of a well-seasoned chicken breast is its versatility. Moving away from deep-frying opens up a world of textures and tastes that are just as satisfying. These methods honor the integrity of the ingredients while offering a gentler approach to cooking, perfect for a weeknight meal or when you simply want a nourishing, delicious dish that feels good from the inside out. It’s all about finding a beautiful balance in the kitchen.
Air Fry for a Lighter Crunch
If you love that signature crispy coating, the air fryer is your friend. This brilliant kitchen tool circulates hot air at high speed, creating a wonderfully crunchy exterior with just a fraction of the oil used in traditional frying. It’s a fantastic way to achieve that satisfying texture while significantly reducing fat. A light spritz of avocado or olive oil is all you need to help the coating turn golden-brown and delicious. This method is a true game-changer for getting a healthier alternative to fried chicken without losing the crunch you crave.
Consider Baking or Grilling
There’s a timeless appeal to a perfectly baked or grilled chicken breast. Baking allows the chicken to cook evenly in its own juices, creating a tender, succulent result with a beautiful golden crust. Grilling imparts a subtle smokiness and those coveted char marks that add a layer of complex flavor. Both methods require minimal added fat and let the quality of the chicken and your seasonings shine through. These options offer a better nutritional profile and are a simple, elegant way to prepare a truly delicious meal.
Keep the Flavor and Texture
Lighter cooking should never mean bland results. The secret to incredible flavor lies in the quality of your ingredients. When you bake, grill, or air fry, the seasonings become even more important. This is where a truly exceptional salt makes all the difference. Our hand-harvested Colima Sea Salt provides a clean, mineral-rich salinity that enhances the chicken’s natural savory notes. Its crisp flake adds a subtle textural element, ensuring every bite is full of depth and character. Paired with fresh herbs and spices, it proves that mindful cooking is always full of flavor.
Get That Golden, Crispy Finish
This is the moment of transformation—when all the care you’ve put into selecting your ingredients and marinating with intention comes to life in the hot oil. Achieving that deep, golden hue and the audible crunch of a perfect crust isn’t an accident; it’s an art that relies on a few final, thoughtful steps. Rushing this stage is the difference between a soft, disappointing coating and a shatteringly crisp one that gives way to juicy, flavorful meat. It’s where the mineral-rich flavor of your Colima Sea Salt in the brine and coating truly gets sealed in.
These methods aren’t complicated, but they do ask for a moment of pause. They honor the final moments of the cooking process, turning a simple meal into something truly memorable. It’s about understanding how temperature and time work together to create that perfect texture. Think of it as the final layer of intention you add to the dish. Before you even think about serving, these techniques ensure every single piece is cooked to perfection, with a crust that holds its crunch and a center that’s perfectly tender. From letting the coating set properly to managing the oil temperature with care, each action contributes to the final, delicious result. Let’s walk through the simple secrets to achieving that coveted golden, crispy finish that makes fried chicken so deeply satisfying.
Let It Rest for a Crispier Bite
Once your chicken is beautifully coated, give it time to rest. This small act of patience is one of the most important secrets to a truly crisp crust. Place the breaded chicken on a wire rack and let it chill in the refrigerator. This resting period allows the flour coating to fully hydrate and adhere to the chicken, creating a second skin. This step is crucial for crispy results that won't fall off in the fryer. Aim for at least 30 minutes, but try not to let it sit for more than a couple of hours, as the coating can become pasty. It’s a simple, quiet step that makes all the difference.
Fix Common Texture Problems
Have you ever pulled a piece of chicken from the fryer, only to find it perfectly golden on the outside but disappointingly undercooked inside? The culprit is often temperature shock. Cooking chicken straight from the cold refrigerator prevents it from being able to cook evenly. The hot oil aggressively cooks the exterior long before the heat can penetrate the cold center. The solution is simple: let your chicken sit at room temperature for about 20 to 30 minutes before frying. This allows the meat to warm up gently, ensuring the inside and outside cook at a more harmonious pace for a juicy, tender result every time.
Try Double Frying for a Crispier Crust
For those who believe the crispier the crust, the better, there is a technique that delivers an unparalleled crunch. It may sound like extra work, but the results are truly remarkable. Double frying involves two rounds in the oil. The first fry, at a lower temperature, cooks the chicken through completely without over-browning the crust. After a brief rest on a wire rack, the chicken goes back into the oil for a second, shorter fry at a higher temperature. This final, hot bath is what creates that shatteringly crisp, golden-brown exterior that stays crunchy long after it leaves the pan.
How to Serve and Store Your Chicken
The moment your chicken comes out of the pan, golden and fragrant, is a small celebration. Sharing this meal is part of the joy, but so is savoring every last piece. Taking a moment to serve and store your chicken with intention ensures that all the care you put into cooking it is honored, from the first bite to the last.
What to Serve with Your Fried Chicken
A beautifully fried chicken breast deserves companions that complement its rich flavor and crispy texture. Think of creating a plate that balances comfort and freshness. Fluffy buttermilk biscuits are perfect for soaking up every delicious drop, while creamy mashed potatoes offer a comforting, classic pairing.
For a touch of brightness, a simple corn salad or tender green beans can cut through the richness and round out the meal. These sides transform a simple dish into a memorable feast, inviting everyone to slow down and connect around the table. The goal is a meal that feels both nourishing and deeply satisfying.
How to Store and Reheat Leftovers
To keep your leftover chicken just as delightful the next day, a few simple steps make all the difference. Once fried, let the chicken rest on a wire rack instead of paper towels. This allows air to circulate underneath, preventing the bottom from steaming and losing its wonderful crispness.
When you’re ready to put it away, store the cooled chicken in an airtight container in the refrigerator. To bring back that just-fried crunch, gently reheat it in the oven. A moderate temperature, around 375°F, will warm it through while re-crisping the coating, ensuring your second-day meal is just as special as the first.
A Few Final Tips for Success
Creating that perfect plate of fried chicken is a beautiful ritual, a practice of turning simple ingredients into something truly special. As with any practice, a few gentle reminders can help us find our rhythm in the kitchen. These final thoughts are here to support you on your way to a crispy, juicy, and deeply satisfying meal.
Avoid These Common Mistakes
Patience is a key ingredient in this recipe. One of the most frequent missteps is cooking chicken straight from the fridge. When the meat is too cold, the outside can overcook while the center remains underdone. Allow your chicken breasts to rest at room temperature for about 20 minutes before they meet the heat. This small pause ensures the chicken cooks evenly from edge to center. It’s a simple act of intention that makes all the difference, preventing that dreaded combination of a dry exterior and an improperly cooked interior.
Helpful Kitchen Tools
The right tools are like trusted friends in the kitchen—they offer support and help you cook with confidence. For frying, a heavy Dutch oven or a deep, cast-iron skillet is your best companion. These pots hold heat beautifully, keeping the oil at a steady temperature for a consistently golden crust. A deep-fry thermometer is another invaluable tool, taking the guesswork out of achieving the perfect oil temperature. It allows you to work with precision, ensuring your chicken emerges from the oil perfectly cooked, wonderfully crisp, and never greasy.
Find Your Balance of Flavor and Wellness
Seasoning is where flavor and wellness meet. Sodium is an essential mineral our bodies need for muscle and nerve function, and choosing the right kind matters. Unlike processed table salt, unrefined sea salt retains a beautiful spectrum of trace minerals. Our Colima Sea Salt, harvested by hand, offers a clean, mineral-rich flavor that seasons your food with intention. When you cook with high-quality, natural ingredients, you’re not just making a meal; you’re creating a moment of nourishment for yourself and those you share your table with.
A Note on Nutrition
Enjoying food with intention means understanding what goes into it. Fried chicken is a comfort food classic, a dish meant for connection and satisfaction. This isn't about creating a "healthy" version that misses the point, but about making mindful choices that honor both flavor and your body. When you cook with awareness, even the most indulgent meals can feel nourishing.
What's in Your Fried chicken?
Let's be honest: deep-frying changes the food we cook. While that incredible crunch is part of the magic, it’s good to know what’s happening inside that crispy coating. Fried chicken is still a wonderful source of protein, which helps you feel full and satisfied long after the meal is over. A single chicken breast can provide a significant amount of your daily protein needs. Acknowledging this helps us appreciate the dish for what it is—a rich, flavorful, and deeply satisfying treat to be enjoyed with presence and gratitude.
The Impact of Quality Ingredients
This is where you can make a simple choice that has a real impact. The quality of your ingredients, especially your salt, matters. When you reach for a truly unrefined sea salt, you’re choosing flavor and function without the additives found in common table salt. Our Colima salt isn’t just sodium; it’s a complex crystal carrying trace minerals from the earth.
These essential minerals, like potassium, magnesium, and calcium, play a supportive role in our bodies. Using an unrefined salt infuses your fried chicken with a subtle, mineral-rich depth that processed salt simply can't replicate. It’s a small shift that honors the ingredient and adds a layer of intentional wellness to your cooking.
Related Articles
- Crispy Baked Chicken Strips Recipe (Easy Steps!) – Santa Prisca & Co
- Broiled Chicken Recipes Whole: Crispy Skin Guide – Santa Prisca & Co
- Sea Salt for Cooking: Types, Benefits, and How to Use It Like a Pro – Santa Prisca & Co
- Unrefined Sea Salt: Ultimate Flavor & Health Guide – Santa Prisca & Co
Frequently Asked Questions
Why does my breading always fall off in the fryer? This is such a common frustration, but the fix is beautifully simple. After you’ve coated your chicken, let it rest on a wire rack in the refrigerator for at least 30 minutes. This quiet pause gives the flour time to absorb moisture from the marinade and the chicken, creating a paste-like layer that clings perfectly during frying. It’s a small act of patience that ensures your crispy crust stays right where it belongs.
Does using a good sea salt really make a difference in fried chicken? It truly does, and the difference goes beyond simple saltiness. When you use a mineral-rich, unrefined sea salt in your marinade, it seasons the chicken from the inside out, helping it retain moisture for a juicier result. In the coating, its clean, complex flavor enhances the other spices and the natural taste of the chicken itself, creating a savory depth that you just can’t get from processed table salt.
What if I don't have buttermilk for the marinade? No buttermilk? No problem. The purpose of the buttermilk is to tenderize the chicken with its gentle acidity. You can achieve a similar effect with plain Greek yogurt or even sour cream. Both will give you incredibly tender meat and add their own subtle, delicious tang. Think of it as an opportunity to add another layer of flavor to your dish.
How can I make sure my chicken is juicy and not dry? The secret to juicy chicken lies in a few key steps. First, a good marinade is essential for infusing moisture. Second, let your chicken rest at room temperature for about 20 minutes before frying to ensure it cooks evenly. Finally, a meat thermometer is your best friend. Pulling the chicken from the oil when it reaches an internal temperature of 155°F prevents overcooking and guarantees a succulent result every time.
Is there a way to get a super crispy crust without deep frying? Absolutely. If you’re looking for a lighter approach, the air fryer is a fantastic tool. It circulates hot air to create a wonderfully crunchy exterior with very little oil. The key is to still follow the steps for a great coating—the double-dip method works beautifully here. You’ll get that satisfying texture you’re looking for while keeping the meal a bit lighter.